Table of Contents
Installation
Login to your WordPress dashboard.
Navigate to Plugins > Add New and click on the Upload Plugin button.
Choose the plugin zip file and click Install Now.
Once installed, click Activate.
Next is to activate your license key. If you don’t do this, plugin updates will not be delivered to your site. That is, you won’t be able to see updates nor apply the update from your WordPress dashboard.
Getting started
After the installation, you can embed the rating widget to your posts with the shortcode [ratemypost] or automatically in the plugin’s settings. The “rating widget” lets visitors rate your posts (star rating).
The plugin also comes with the results widget. The results widget shows the rating but is not interactive (it doesn’t accept votes).
On most websites, you will find such a widget at the top of the post, after the title. You can embed the results widget with the shortcode [ratemypost-result] or automatically in the plugin’s settings.
It is also possible to embed a rating of whichever post by passing the post’s ID to the shortcode.
[ratemypost id="1"] – embeds rating widget for the post with the ID of 1
[ratemypost-result id="1"] – embeds results widget for the post with the ID of 1
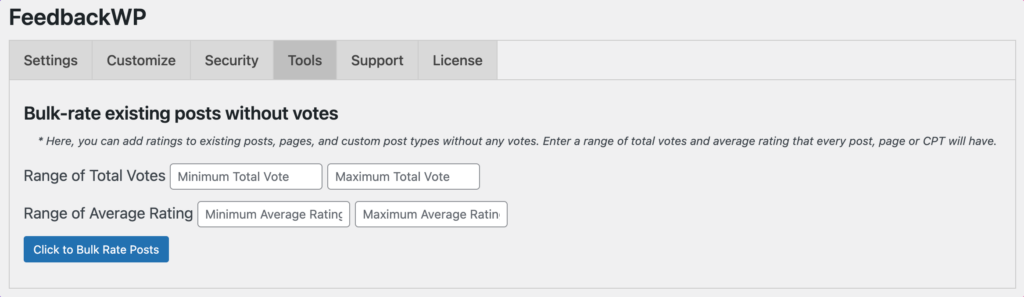
Bulk Rating Tool
Adding Ratings & Votes to Existing Posts
If you want to add ratings and votes for all existing or historical posts on your site, you can use our Bulk Rating tool. However, this will only affect posts, pages, and custom post types on which the rating widget is displayed.
Go to Settings >> Tools.
Add a range of total votes and average ratings, and finally, click the Submit Button.
Options
The Rate My Post plugin is probably the most customizable and adjustable WordPress rating plugin. It has many options that allow you to customize the plugin to fit your website completely.
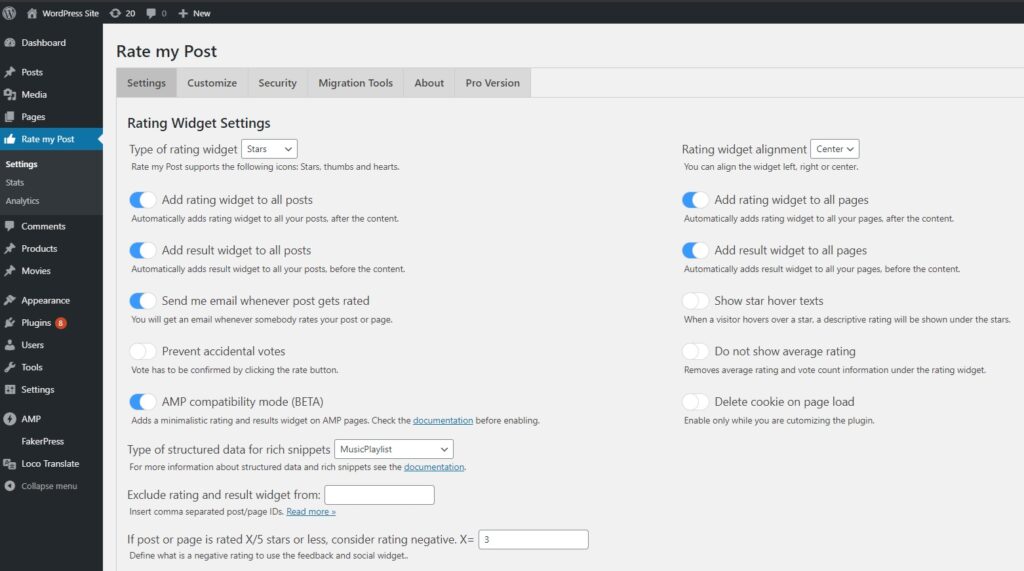
Below is a brief description of settings that might be a bit confusing to beginners.
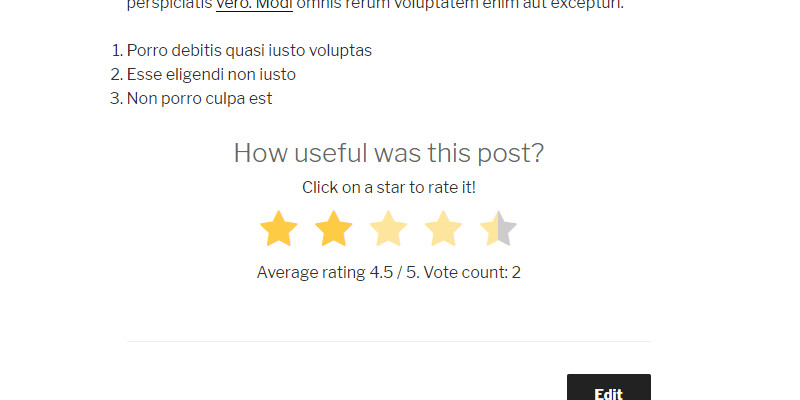
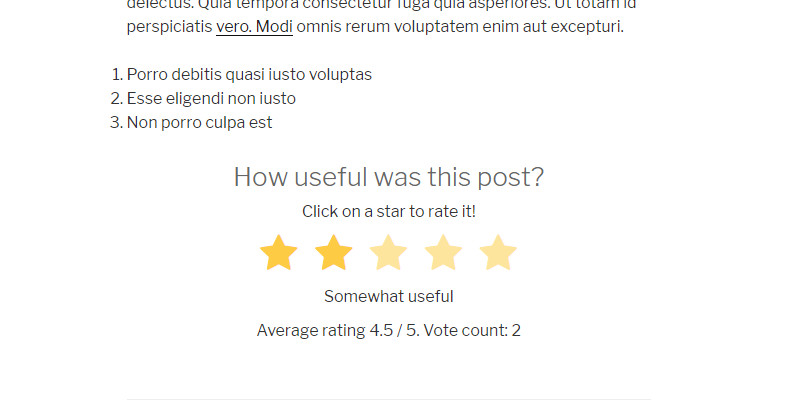
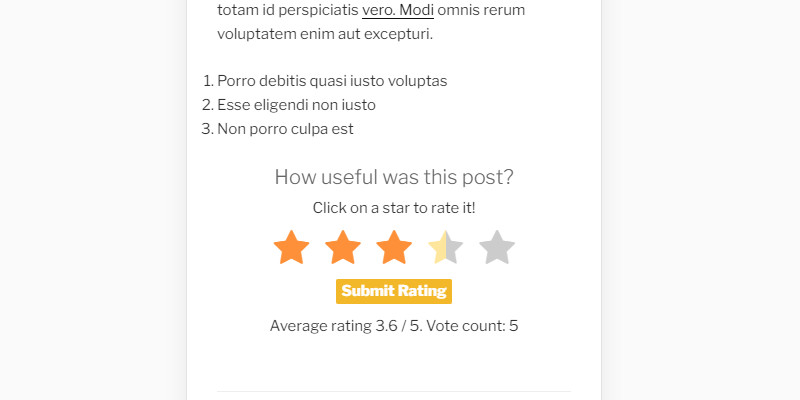
Show star hover texts
This is a handy feature to prevent accidental votes. When a user hovers over the stars, the descriptive rating is shown under the stars.
Disabled (hovering over two stars):
Enabled (hovering over two stars):
Prevent accidental votes
When a visitor clicks on a star, they need to confirm the vote by clicking the “Rate” button that pops up under the widget. It prevents the visitors from accidentally casting votes. This feature is especially useful for touch devices.
Delete cookie on page load
After the page is refreshed, the cookie is deleted. This feature comes in handy while setting up the plugin, and you might want to cast multiple votes to see how the plugin performs.
Exclude rating and result widgets from
If you automatically add the rating/results widget to your posts or pages in the options, you might want to remove it from specific posts/pages, for example, the About Us page. Here, you should insert comma-separated post/page IDs. To get the post ID, visit your admin dashboard’s posts/pages menu and click on the page/post you need an ID for. Then check the URL, and you should see something like “www.example.com/wp-admin/post.php?post=61&action=edit”. The ID is the number in the URL. In this case, it is 61.
Type of structured data for rich snippets
Here, you can select which structured data type you want to embed. Search engines might show rich snippets on results pages if your website is trustworthy and high-quality. The Rate My Post plugin supports all structured data types that Google recognizes except HowTo, SoftwareApplication, and Event. SoftwareApplication and Event structured data types are available in the PRO version. Since September 2019, Google has shown rich snippets only for a handful of structured data types. Read more about this here.
If you are not sure which structured data type to choose, find information about each structured data type on schema.org. If your blog posts don’t fit any of the available categories, you are, according to Google Guidelines, not eligible for rich snippets.
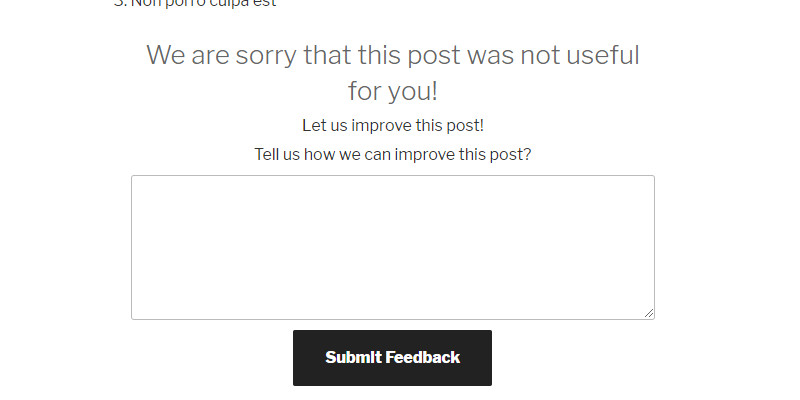
Feedback Widget
It can be enabled in the settings. The Feedback Widget allows visitors to send you private feedback after they rate a post on your website. The idea behind the feedback widget is that you can improve your posts. It will be shown if the post gets a negative rating. You define what is a negative rating in the settings; “If post or page is rated X/5 stars or less, consider the rating negative.”.
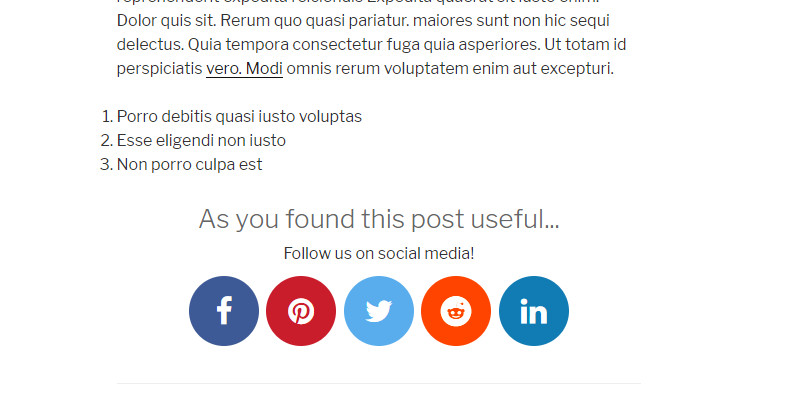
Social Widget
It can be enabled in the options. The Social Widget shows social follow or social share icons/links after the post has been rated positively. You define what is a positive rating in the options. You can also choose whether to show social follow or share buttons.
how ratings on archive pages
This feature will show ratings with stars on archive pages (list of posts) next to the title. It will also show ratings on the main blog page.
Multilingual website compatibility mode
You should enable this feature if your website is available in more than one language. After enabling this feature, you won’t be able to modify strings in the Customize section. You should instead modify strings with a translation plugin such as Loco Translate.
Customize
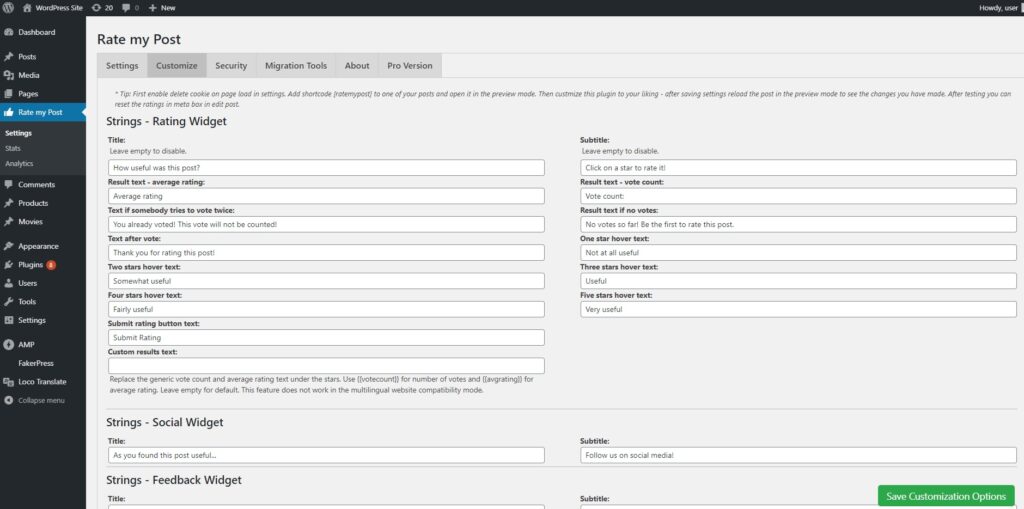
In the customize section, you can change colors and sizes and modify strings. All settings here are pretty straightforward.
Security Options

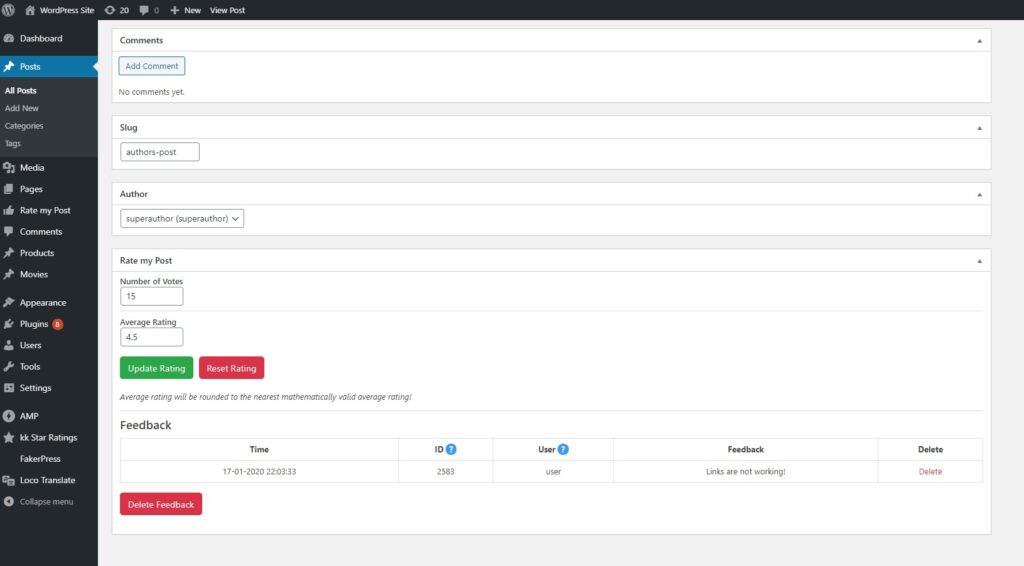
Ratings manipulation requires the role of
Rate My Post enables you to change ratings in the backend in the post editor (meta box at the bottom). Here, you can set which role is required to manipulate ratings. Available options are Admin, Author, and Editor.
Who can rate posts
Here, you can select who can rate posts. By default, all visitors can rate posts. Nevertheless, you can limit rating capability to only logged-in users.
Track IP addresses
If this feature is enabled, voters’ IP addresses will be tracked and available in the Analytics section. This feature must be enabled to prevent double votes via IP address. If this feature is enabled, GDPR compliance is voided.
Track users
If this feature is enabled, you will see the nicknames of logged-in users who rated your posts in the analytics section. This feature also prevents double votes for logged-in users.
Google reCAPTCHA v3
Google reCAPTCHA v3 verifies if an interaction is legitimate without any user interaction. You will need the reCAPTCHA v3 site and secret keys to use this option. The service is free of charge. You can get the keys here: reCAPTCHA v3.
Migration Tools
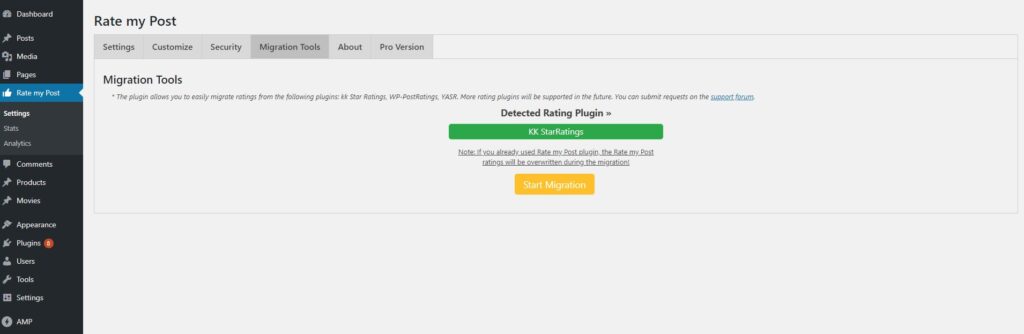
With one click, the migration tools allow you to migrate votes and ratings from kk Star Ratings, YASR, and WP-PostRatings. The tools are available if one of the plugins is installed on your website.
Filters
Filters provide a way for functions to modify data of Rate My Post functions.
Modifying strings for custom post types, specific categories, etc.
The rmp_custom_strings filter allows you to change strings in various scenarios. For example, if you have a book custom post type, you probably want different texts in the book posts. The strings for the book posts can be easily modified, as shown in the example below.
/*FILTER EXAMPLE
The array has the following keys:
rateTitle,
rateSubtitle,
rateResult,
rateResult2,
cookieNotice,
noRating,
afterVote,
star1,
star2,
star3,
star4,
star5,
socialTitle,
socialSubtitle,
feedbackTitle,
feedbackSubtitle,
feedbackText,
feedbackNotice,
feedbackButton,
feedbackAlert,
submitButtonText
*/

function blazzdev_modify_rmp_strings( $stringsArray ) {
  if ( is_singular( 'book' ) ) { //modify only for Book custom post type
    $stringsArray['rateTitle'] = 'Did you like this book?';
    $stringsArray['rateSubtitle'] = 'Click on a star to rate this book!';
    $stringsArray['afterVote'] = 'Thank you for rating this book';
    $stringsArray['socialTitle'] = 'As you found this book useful...';
    $stringsArray['feedbackTitle'] = 'How come you did not like this book?';
    $stringsArray['feedbackSubtitle'] = 'How could this book be improved?';
    $stringsArray['feedbackText'] = 'Give us some tips...';
  }
  return $stringsArray;
}

add_filter( 'rmp_custom_strings', 'blazzdev_modify_rmp_strings' );
Code goes to your child’s theme functions.php.
Removing specific social share icons
If you enable the social widget and the “use social share icons instead of social follow icons” in the settings, the plugin will, by default, print all available social share icons. However, as shown below, you can remove specific social share icons with the filter. The snippet below will remove the Twitter and the Reddit social share icon.
function blazzdev_remove_social_icons( $socialLinks ) {
  unset( $socialLinks['twitter'] );
  unset( $socialLinks['reddit'] );
  return $socialLinks;
}
add_filter( 'rmp_social_links', 'blazzdev_remove_social_icons' );
Remove the rating widget from posts in a specific category
The snippet below will remove the rating widget from posts in the Uncategorized category
add_filter( 'rmp_display_rating_widget', 'blazzdev_show_rating_widget' );

function blazzdev_show_rating_widget() {
  if( in_category( 'uncategorized' ) ) { // category slug
    return false;
  }
  return true;
}
Remove the results widget from posts in a specific category
The snippet below will remove the results widget from posts in the Uncategorized category
add_filter( 'rmp_display_results_widget', 'blazzdev_show_results_widget' );

function blazzdev_show_results_widget() {
  if( in_category( 'uncategorized' ) ) { // category slug
    return false;
  }
  return true;
}
Change the best rating
The snippet below will change the 5-star rating system to the 10-star rating system.
Warning: After enabling, there is no way of going back to the 5-star rating system except by deleting all ratings.
add_filter( 'rmp_max_rating', 'blazzdev_max_rating', 10, 1 );

add_filter( 'rmp_custom_strings', 'blazzdev_modify_rmp_strings' );

function blazzdev_max_rating( $rating ) {
  return 10;
}

function blazzdev_modify_rmp_strings( $stringsArray ) {
  $stringsArray['star6'] = 'Perfect';
  $stringsArray['star7'] = 'Perfect';
  $stringsArray['star8'] = 'Perfect';
  $stringsArray['star9'] = 'Perfect';
  $stringsArray['star10'] = 'Perfect';
  return $stringsArray;
}
Remove ratings from specific archive pages or home page
If you enable the “show ratings on archive pages” feature in the settings, the plugin will, by default, show ratings on all archive pages and the main blog page. With this filter, you can remove ratings from specific archives or the main blog page.
Example 1:
The code below will remove ratings from author archives.
function blazzdev_exclude_author( $content ) {
  if ( is_author() ) {
    return false;
  } else {
    return $content;
  }
}
add_filter( 'rmp_archive_results', 'blazzdev_exclude_author' );
Example 2:
The snippet below will remove ratings from the main blog page.
function blazzdev_exclude_home( $content ) {
  if ( is_home() ) {
    return false;
  } else {
    return $content;
  }
}
add_filter( 'rmp_archive_results', 'blazzdev_exclude_home' );
Replacing the default icons (stars, etc.) with custom icons
This filter enables you to add a custom class to the icon or replace the default class with the custom class. Therefore, you can use your icons (via background-image property) or whichever icon from FontAwesome (if you use FontAwesome on your website). The code below will replace the stars with the FontAwesome car icons.
[class^="rmp-icon--"], [class*=" rmp-icon--"] {
    font-family: 'Font Awesome 5 Free'!important;
}
The code goes to your child theme’s style.css.
Then you append the FontAwesome car icon to Rate my Post icons like shown below:
function blazzdev_custom_class( $class ) {
  return $class . ' fas fa-car';
}

add_filter( 'rmp_rating_icon_class', 'blazzdev_custom_class' );
Changing the schema type
This filter enables you to change the schema type.
Example 1 – Change the schema type for a custom type:
Let’s say that you have a custom post type of recipe, and of course, you want the recipe schema in all recipe posts. Nevertheless, elsewhere, you want the schema type selected in the options.
function blazzdev_schema( $schemaType ) {
  if( is_singular( 'recipe' ) ) {
    return 'Recipe';
  }
  return $schemaType;
}

add_filter( 'rmp_schema_type', 'blazzdev_schema' );
Changing the structured data
This filter enables you to modify the complete structured data.
Example:
function blazzdev_structured_data( $structuredData ) {
  $structuredData = '
  <script type="application/ld+json">
    //your structured data
  </script>
  ';

  return $structuredData;
}

add_filter( 'rmp_structured_data', 'blazzdev_structured_data' );
Remove IP double vote protection for posts, custom post types, etc.
This filter enables you to remove IP double vote protection if specified conditions are met. In the example below, we remove IP double vote protection for the post with the ID 246.
function blazzdev_remove_ip_double_vote( $doubleVotes, $postID ) {
  if ( $postID == 246 ) {
    //return an empty array - meaning no matches for the ip
    $doubleVotes = array();
  }
  return $doubleVotes;
}

add_filter( 'rmp_double_vote', 'blazzdev_remove_ip_double_vote', 10, 2 );
Remove double vote protection based on user IDs (applies only to logged-in users)
If user tracking is enabled in the security options, the plugin checks if the user has already rated the post before saving the rating. This is useful in case you only allow logged-in users to rate. The plugin doesn’t run this check for admins. To disable double vote protection based on user IDs, use the filter below.
add_filter( 'rmp_double_vote_by_id', 'blazzdev_disable_double_vote_protection_by_id', 10, 2 );

function blazzdev_disable_double_vote_protection_by_id( $match, $post_id ) {
  return array();
}
Hide usernames in the analytics section and feedback section
If user tracking is enabled, usernames are shown in the analytics and feedback section. If you only use user tracking to prevent double votes and want to hide usernames in the analytics and feedback section, use this filter as shown below.
add_filter( 'rmp_rater_username', 'blazzdev_hide_rater_username' );

function blazzdev_hide_rater_username( $username ) {
  return 'Hidden for privacy reasons!';
}
Merge ratings during the migration
This filter enables you to merge the ratings of the Rate My Post plugin and another plugin during the migration. Rate My Post supports migration from the following plugins: kk Star Ratings, YASR, and WP-PostRatings.
function blazzdev_merge_during_migration( $merge ) {
  return true;
}

add_filter( 'rmp_migrate_merge', 'blazzdev_merge_during_migration' );
Change email address
Rate my Post plugin, which, by default, sends emails about new votes and feedback to the admin email. You can change the email with this filter.
add_filter( 'rmp_mail_address', 'blazzdev_change_rmp_email' );

function blazzdev_change_rmp_email( $email ) {
  return '[email protected]';
}
Change subject for “post-rated” emails
You can modify the subject of the “post-rated” email with this filter.
add_filter( 'rmp_mail_subject', 'blazzdev_rate_mail_custom_title', 10, 7 );

function blazzdev_rate_mail_custom_title( $subject, $postID, $rating, $newAvgRating, $newVoteCount, $postTitle, $postLink ) {
  return $postTitle. ' rated ' . $rating . ' and now has ' . $newVoteCount . ' votes and rating of ' . $newAvgRating;
}
Change the text for “post-rated” emails
You can modify the text (content) of the “post-rated” email with this filter.
add_filter( 'rmp_mail_text', 'blazzdev_rate_mail_custom_text', 10, 7 );

function blazzdev_rate_mail_custom_text( $message, $postID, $rating, $newAvgRating, $newVoteCount, $postTitle, $postLink ) {
  return 'Post rated ' . $rating . '. Post name ' . $postTitle;
}
Change subject for “feedback” emails
You can modify the subject of the “feedback” email with this filter.
add_filter( 'rmp_feedback_mail_subject', 'blazzdev_feedback_mail_custom_subject', 10, 4 );

function blazzdev_feedback_mail_custom_subject( $message, $postID, $feedback, $postTitle ) {
  return $postTitle . ' has a new feedback!';
}
Change the text for “feedback” emails
You can modify the text (content) of the “feedback” email with this filter.
add_filter( 'rmp_feedback_mail_text', 'blazzdev_feedback_mail_custom_text', 10, 4 );

function blazzdev_feedback_mail_custom_text( $message, $postID, $feedback, $postTitle ) {
  return 'Comment from a visitor: ' . $feedback . ' Post: ' . $postTitle;
}
Change thumbnail size in top-rated posts widget
You can use custom image sizes for thumbnails with this filter.
add_filter( 'rmp_thumbnail_size', 'blazzdev_rmp_thumb', 10, 2 );

function blazzdev_rmp_thumb( $imageSize ) {
	return 'large';
}
Modify query that retrieves top-rated posts
This filter allows you to modify the query, which retrieves top-rated posts. The top-rated posts widget first retrieves all posts from the website and orders them by average rating and conditions defined in the widget’s settings. So, for example, if you want to display top-rated posts in the current category, you can do this with this filter. The snippet below will display the top-rated posts from the current category.
add_filter( 'rmp_top_rated_query', 'blazzdev_modify_top_rated_query' );

function blazzdev_modify_top_rated_query( $args ) {
  if( is_category() ) {
    $category = get_the_category();
    if( $category ) { // category has posts
      $cat_id = $category[0]->cat_ID;
      $args['cat'] = $cat_id;
    } else { // no posts in category
      return array();
    }
  }
  return $args;
}
Actions
Actions provide a way to run a function at a specific point in the execution of the plugin.
Do something after a rating has been submitted
rmp_after_vote
For example, clear cache, etc.
add_action( 'rmp_after_vote', 'blazzdev_after_vote', 10, 4 );

function blazzdev_after_vote( $post_id, $new_avg_rating, $new_vote_count, $submitted_rating ) {
  // do something
}
The code goes to your child theme’s functions.php.
Do something after the rating has been submitted on the AMP page
rmp_after_vote_amp
For example, clear cache, etc.
add_action( 'rmp_after_vote_amp', 'blazzdev_after_vote', 10, 4 ); // after amp vote

function blazzdev_after_vote( $post_id, $new_avg_rating, $new_vote_count, $submitted_rating ) {
  // do something
}
The code goes to your child theme’s functions.php.
Do something after feedback has been submitted
rmp_after_feedback
For example, save feedback to a custom table, etc.
add_action( 'rmp_after_feedback', 'blazzdev_after_feedback', 10, 2 );

function blazzdev_after_feedback( $post_id, $feedback ) {
  // do something
}
The code goes to your child theme’s functions.php.
Printing custom content beneath all widgets (at the bottom)
rmp_after_all_widgets
This action enables you to print custom content beneath the rating widget. For example, if you allow only registered users to vote, you probably want to notify them that they need to register to vote. See the example below:
function blazzdev_add_after_rating_widgets() {
  if ( !is_user_logged_in() ) {
    echo '<p>Please login to rate!</p>';
  }
}
add_action( 'rmp_after_all_widgets', 'blazzdev_add_after_rating_widgets');
The code goes to your child theme’s functions.php.
Printing custom content above all widgets (at the top)
rmp_before_all_widgets
This action allows you to print custom content above the rating widget. The example below will print “Please login to rate!” before the widget.
function blazzdev_add_before_rating_widgets() {
  if ( !is_user_logged_in() ) {
    echo 'Please login to rate!';
  }
}
add_action( 'rmp_before_all_widgets', 'blazzdev_add_before_rating_widgets');
The code goes to your child theme’s functions.php.
Printing custom content beneath the rating widget on AMP pages
rmp_after_widget_amp
This action enables you to print custom content beneath the AMP rating widget.
add_action( 'rmp_after_widget_amp', 'blazzdev_after_amp_rating_widget' );

function blazzdev_after_amp_rating_widget() {
  echo 'Hello world';
}
The code goes to your child theme’s functions.php.
Printing custom content above the rating widget on AMP pages
rmp_before_widget_amp
This action enables you to print custom content above the AMP rating widget.
add_action( 'rmp_before_widget_amp', 'blazzdev_before_amp_rating_widget' );

function blazzdev_before_amp_rating_widget() {
  echo 'Hello world';
}
The code goes to your child theme’s functions.php.
Printing custom content above the social icons (social widget)
rmp_before_social_icons
This hook lets you print custom content above the social icons in the social widget. Note that a social widget has to be enabled for this feature to work. In the example below, we add the subscribe to the newsletter CTA before the social share icons.
function blazzdev_before_social_icon() {
  echo '<p><a href="https://example.com/subscribe">Subscribe to our newsletter!</a></p>';
}
add_action( 'rmp_before_social_icons', 'blazzdev_before_social_icon');
The code goes to your child theme’s functions.php.
Printing custom content beneath the social icons (social widget)
rmp_after_social_icons
This hook lets you print custom content after the social icons in the social widget. For instance, it can add an additional social network/social share icon. In the example below, we add the Tumblr icon with the link to our Tumblr page. The social widget has to be enabled for this feature to work.
function blazzdev_after_social_icon() {
  echo '<a target="_blank" href="https://www.tumblr.com/mysite" rel="noopener noreferrer"><i class="fa fa-tumblr"></i></a>';
}
add_action( 'rmp_after_social_icons', 'blazzdev_after_social_icon');
The code goes to your child theme’s functions.php.
Printing custom content beneath the social widget
rmp_after_social_widget
This hook enables you to print custom content beneath the social widget itself. In the example below, we add a subscribe link beneath the widget.
function blazzdev_after_social_widget() {
  echo '<p>or subscribe to our newsletter <a href="https://example.com/subscribe">here</a>!</p>';
}
add_action( 'rmp_after_social_widget', 'blazzdev_after_social_widget');
The code goes to your child theme’s functions.php.
Printing custom content above the feedback widget
rmp_before_feedback_form
This hook allows you to print custom content above the feedback form. Note that the feedback widget has to be enabled for this feature to work. The example below adds a Contact Us link above the feedback form.
function blazzdev_before_feedback() {
  echo '<p>We\'d love to hear why you didn\'t like this post. Contact us <a href="https://example.com/about">here</a>!</p>';
}
add_action( 'rmp_before_feedback_form', 'blazzdev_before_feedback');
The code goes to your child theme’s functions.php.
Printing custom content beneath the feedback widget
rmp_after_feedback_form
This hook allows you to print custom content beneath the feedback form. Note that the feedback widget has to be enabled for this feature to work. In the example below, we link to the “about us” page beneath the feedback form.
function blazzdev_after_feedback() {
  echo '<p>or learn more about us <a href="https://example.com/about">here</a>!</p>';
}
add_action( 'rmp_after_feedback_form', 'blazzdev_after_feedback');
The code goes to your child theme’s functions.php.
Adding additional information to the Top Rated Posts widget
rmp_before_widget_title
The top-rated posts widget shows the top-rated posts with the following information: featured image, visual rating, and title. If you want to add additional information such as author name, published date, modified date, etc., you can do so with this filter. The example below shows how to add the published date.
function blazzdev_trpw_published_date( $postID ) {
  $date = get_the_date( '', $postID );
  echo '<p>Published: '. $date . '</p>';
}
add_action( 'rmp_before_widget_title', 'blazzdev_trpw_published_date' );
The code goes to your child theme’s functions.php.
Global Functions/Methods
The Rate My Post WordPress plugin allows you to build custom solutions on top of it. With the global functions, you can quickly get information such as vote count, average rating, etc., for use globally on your website.
Get the average rating
rmp_get_avg_rating( $postID )
This function returns the average rating for the specified post. If $postID is not provided, it returns the average rating for the current post. In case of no ratings, the function returns 0.
rmp_get_avg_rating( $postID )Get the vote count
rmp_get_vote_count( $postID )
This function returns the vote count for the specified post. If the $postID is not provided, it returns the vote count for the current post. In case of no ratings, the function returns 0.
rmp_get_vote_count( $postID )Get the visual rating
rmp_get_visual_rating( $postID )
This function returns a visual rating (stars or whichever icon you chose in the options) for the specified post. If the postID is not provided, it returns a visual rating for the current post.
rmp_get_visual_rating( $postID )Get the top-rated posts
rmp_get_top_rated_posts( $max_posts, $required_rating, $required_votes )
This function returns an array of top-rated posts with titles, URLs, featured images, average ratings, and vote counts. It accepts three arguments: the number of posts, the required minimum average rating, and the required vote count. With this function, you can build your own top-rated posts widget.
rmp_get_top_rated_posts( $max_posts, $required_rating, $required_votes );CSS Snippets
The style can be further adjusted with custom CSS. Below are some CSS snippets which you can use.
Hide the plugin for users who are not logged in
If the “Only logged-in users can vote” feature is enabled, you can hide the plugin for users who are not logged in. See the example below.
.rmp-rating-widget--no-privilege {
    display: none;
}
The code goes to your child theme’s style.css.
Hide the rating widget if the user has already rated the post
With the snippet below, the rating widget won’t show if the user has already rated the post.
rmp-rating-widget--has-rated {
    display: none;
}
The code goes to your child theme’s style.css.
Hide results from archive pages where the post hasn’t been yet rated
With the snippet below, you can hide the ratings next to the post title on archive pages for posts that haven’t yet been rated.
.rmp-archive-results-widget--not-rated {
    display: none;
}
The code goes to your child theme’s style.css.
Style the submit rating button
The submit rating button is displayed if the “prevent accidental votes” feature is enabled. It can’t be styled in the customize section, but you can easily style it with custom CSS.
button.rmp-rating-widget__submit-btn.rmp-btn {
    background-color: red;
}
The code goes to your child theme’s style.css.
Style the Submit feedback button
The submit feedback button can’t be styled in the customize section, but you can easily style it with custom CSS.
button.rmp-feedback-widget__btn.rmp-btn.rmp-btn--large {
    height: 70px;
    padding: 10px;
    width: 250px;
    margin: 1em auto;
    background-color: #FEB1C0;
    border: none;
    border-radius: 3px;
    text-transform: uppercase;
    letter-spacing: 0.5em;
}

button.rmp-feedback-widget__btn.rmp-btn.rmp-btn--large:hover {
    cursor: pointer;
    background-color: blue;
}
The code goes to your child theme’s style.css.
Hide the Google ReCaptcha badge (only if ReCaptcha is enabled)
Note that you must include a link to the terms of use and the privacy policy according to the reCAPTCHA v3 Terms of Use.
.grecaptcha-badge {
  display: none;
}
The code goes to your child theme’s style.css.
Change the color of empty stars
With the snippet below, we are changing the color of empty stars in the rating widget to #e6e6ff.
.rmp-icon--ratings {
    color: green;
}
The code goes to your child theme’s style.css.
Change the text area width in the feedback widget
With the snippet below we are making the text area in feedback widget take 100% of the page width.
.rmp-widgets-container.rmp-wp-plugin.rmp-main-container .rmp-feedback-widget__input {
    min-width: 100%; /* Width of text area */
}
The code goes to your child theme’s style.css.
Troubleshooting
While Rate my Post plugin works with most themes and plugins, it’s impossible to ensure 100% compatibility, not least because many WordPress websites use custom solutions. Below are the most common fixes.
The “Add rating widget to all posts” feature is not working
In case that that the rating widget is not inserted automatically I recommend using shortcodes instead. If this sounds like too much work you can always include the widget directly in the template with the following snippet:
<?php echo do_shortcode('[ratemypost]'); ?>The best place to add this snippet is under the while loop in the single.php file of your theme (/wp-content/themes/yourtheme/single.php).

I’m getting the invalid WP Token (nonce) error
Nonces are a WordPress security feature and due to their implementation, they won’t work on pages that are cached for more than 24 hours. If you are getting the “invalid nonce error” when you submit a rating, it’s likely that the page has been cached for more than 24 hours. Most caching plugins by default don’t cache pages for more than 24 hours, exactly because of nonces. The exception is the LiteSpeed Cache WordPress plugin. If you are using the LiteSpeed cache plugin you should set TTL to 86400 under “cache” as shown below.

How to fix the invalid WP Token (nonce) error?
- The easiest way to fix the problem is to set the page cache expiry to less than 24 hours in your cache plugin. As explained above most cache plugins by default have cache expiry set to less than 24 hours in order not to cause issues with nonces.
- Alternatively you can increase the nonce lifespan to match you cache expiry interval. The code below changes nonce lifespan to one week.
add_filter( 'nonce_life', function () { return 168 * HOUR_IN_SECONDS; } );Code goes to your child theme’s functions.php.
I want to add the rating widget to Elementor template
Calling the shortcode [ratemypost] in Elementor template will not work because Rate my Post will have trouble recognizing which post is being rated. A workaround is required to call the shortcode in Elementor template. First you should install the ACF WordPress plugin and then follow these steps:
- Create ACF Field
- Set
[ratemypost]as default - Add value of ACF field as dynamic content to a text field in the template
Dots are shown before the stars
If dots are shown before the stars in the rating widget, this snippet typically helps.
.rmp-widgets-container.rmp-wp-plugin.rmp-main-container .rmp-rating-widget__icons-list__icon:before {
    content: '';
}
Code goes to your child theme’s style.css.
Stars are shown vertically
If stars are shown vertically, this snippet typically helps.
.rmp-widgets-container.rmp-wp-plugin.rmp-main-container .rmp-rating-widget__icons-list__icon {
    display: inline-block !important;
    width: auto;
}
Code goes to your child theme’s style.css.
AMP Compatibility (BETA)
Since version 2.3.0, the plugin is AMP-compatible, and since version 3.3.0, it comes with style. Currently, AMP and AMP for WP plugins are supported. It will not work with other plugins.
To add rating/result widgets to your AMP pages, simply enable AMP compatibility mode in the advanced settings. If you are using AMP for the WP plugin, an extra step is required. See below.
If you are using AMP for WP plugin, you will have to disable form sanitization as the plugin automatically strips forms out of the document. A tutorial on how to do this is available here. If you are having trouble disabling the sanitizer, you can simply download and install this plugin (see code on GitHub), which will automatically disable the sanitizer in the AMP for WP plugin.